NinoPad transforms your spare iPhone or iPad into a versatile, tactile Mac control deck. Whether you need to send frequent snippets, trigger complex shortcuts with a single tap, or adapt to professional creative suites via "Studio View", you can customize everything visually in the on-device desktop editor.
This guide walks you through the entire workflow: starting from a built-in preset, entering edit mode, adding buttons, resizing grid spans, binding specific actions, and customizing visual styles.
1. Explore from Built-in Preset Layouts
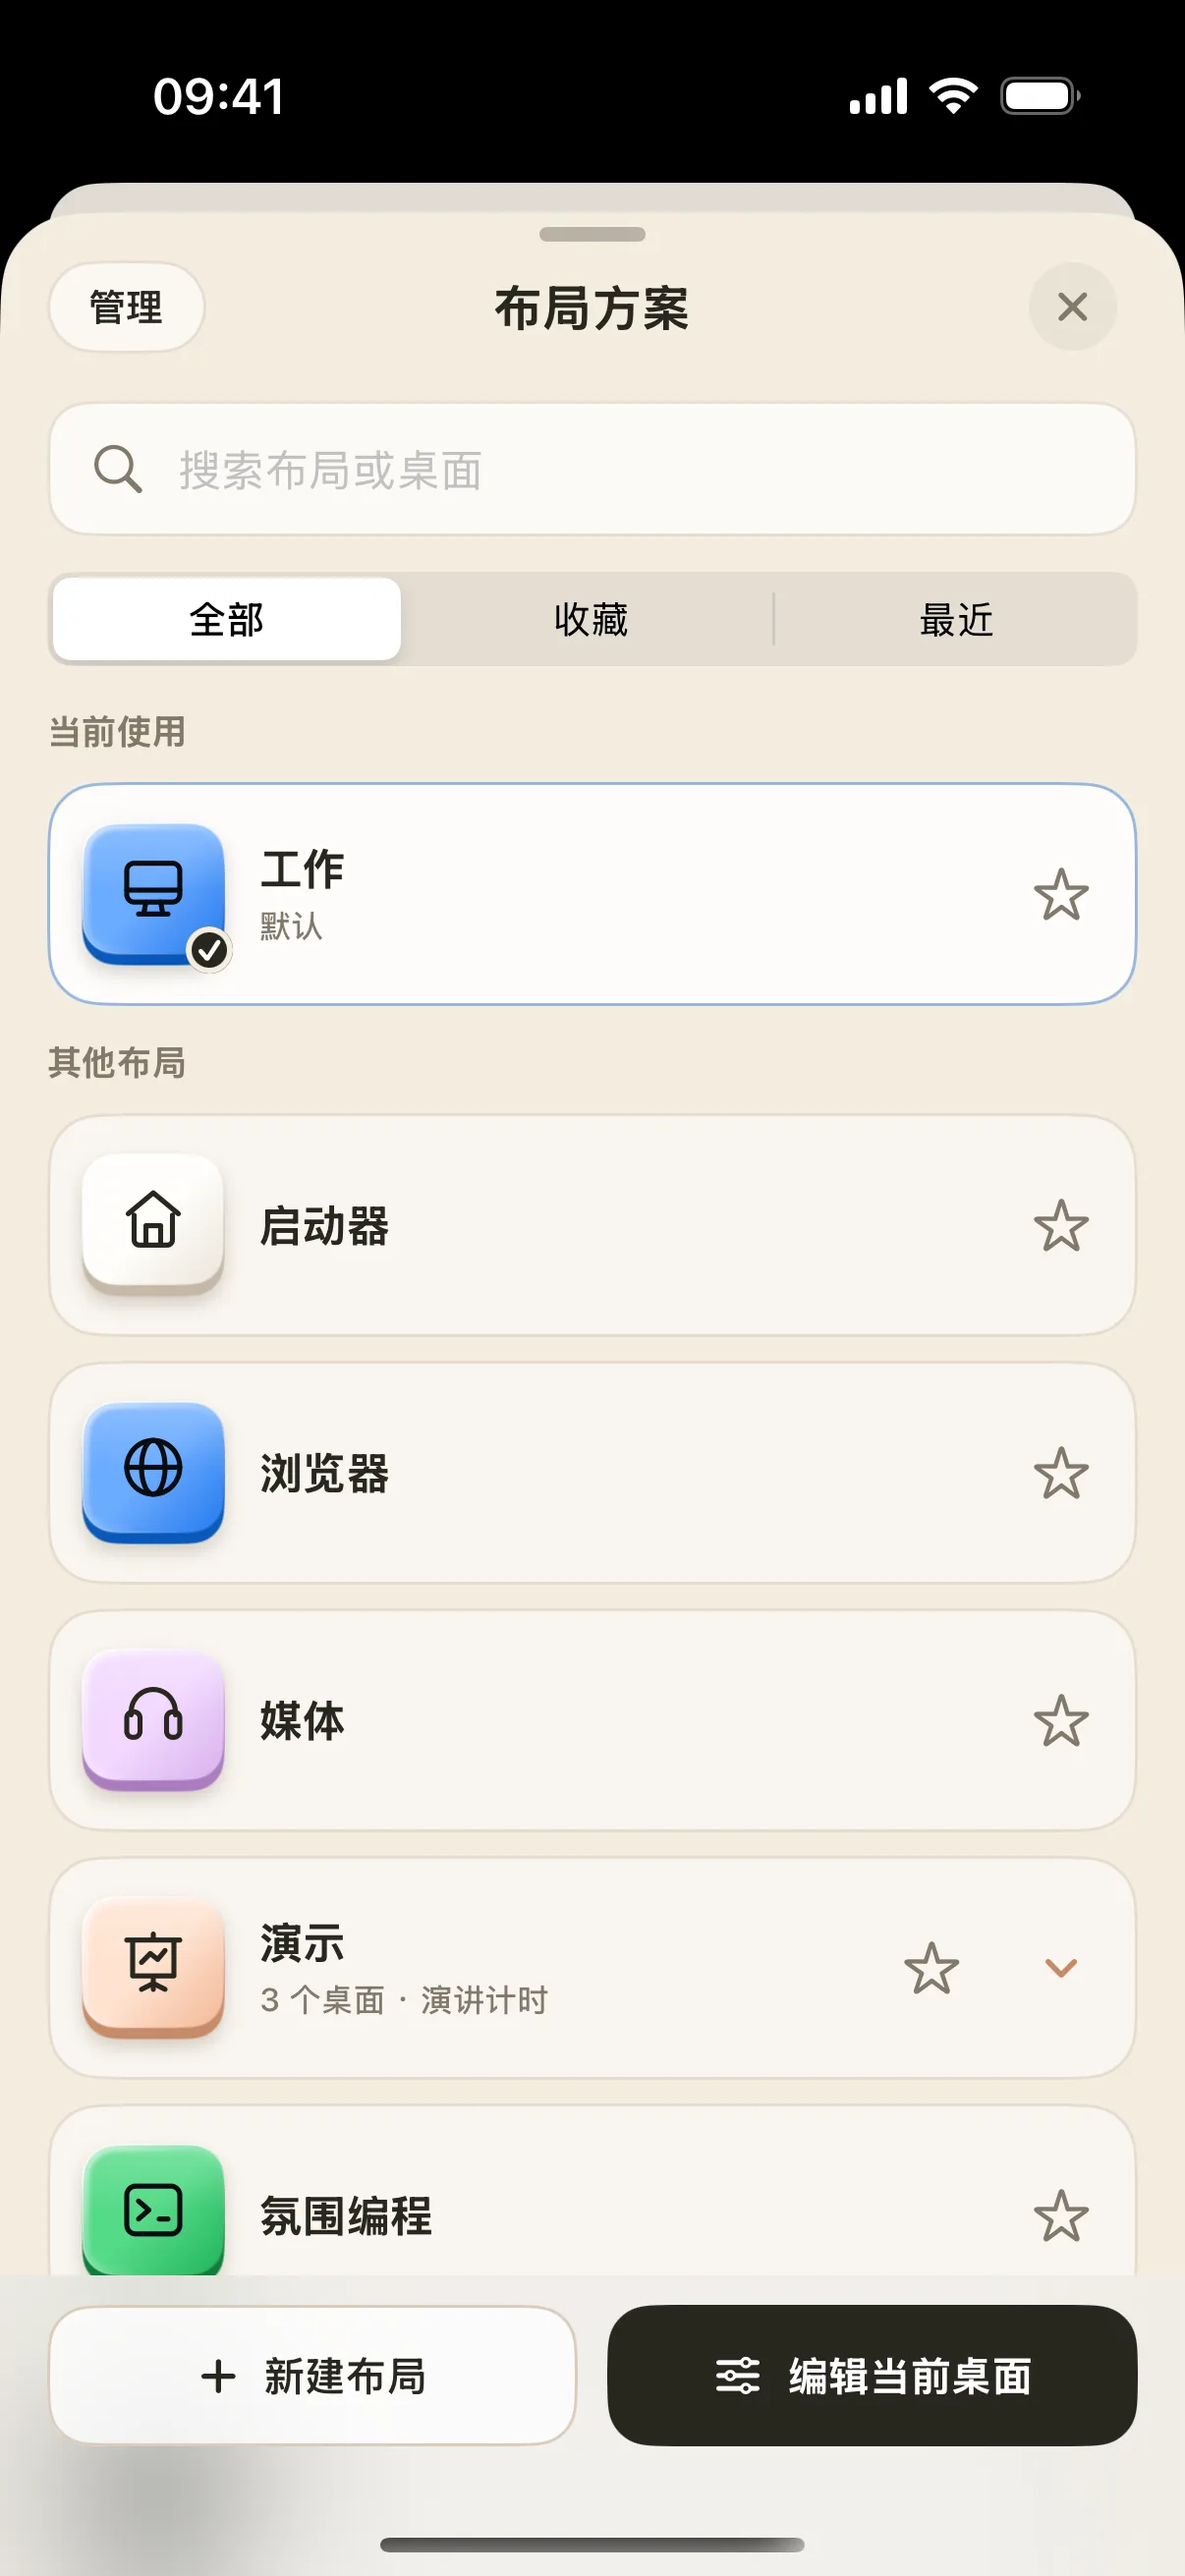
NinoPad includes dozens of presets covering office productivity, web browsing, media control, coding, and creative suites. In the "Layouts" tab at the bottom of the app, simply tap any preset to start using it immediately.
2. Enter Desktop Edit Mode
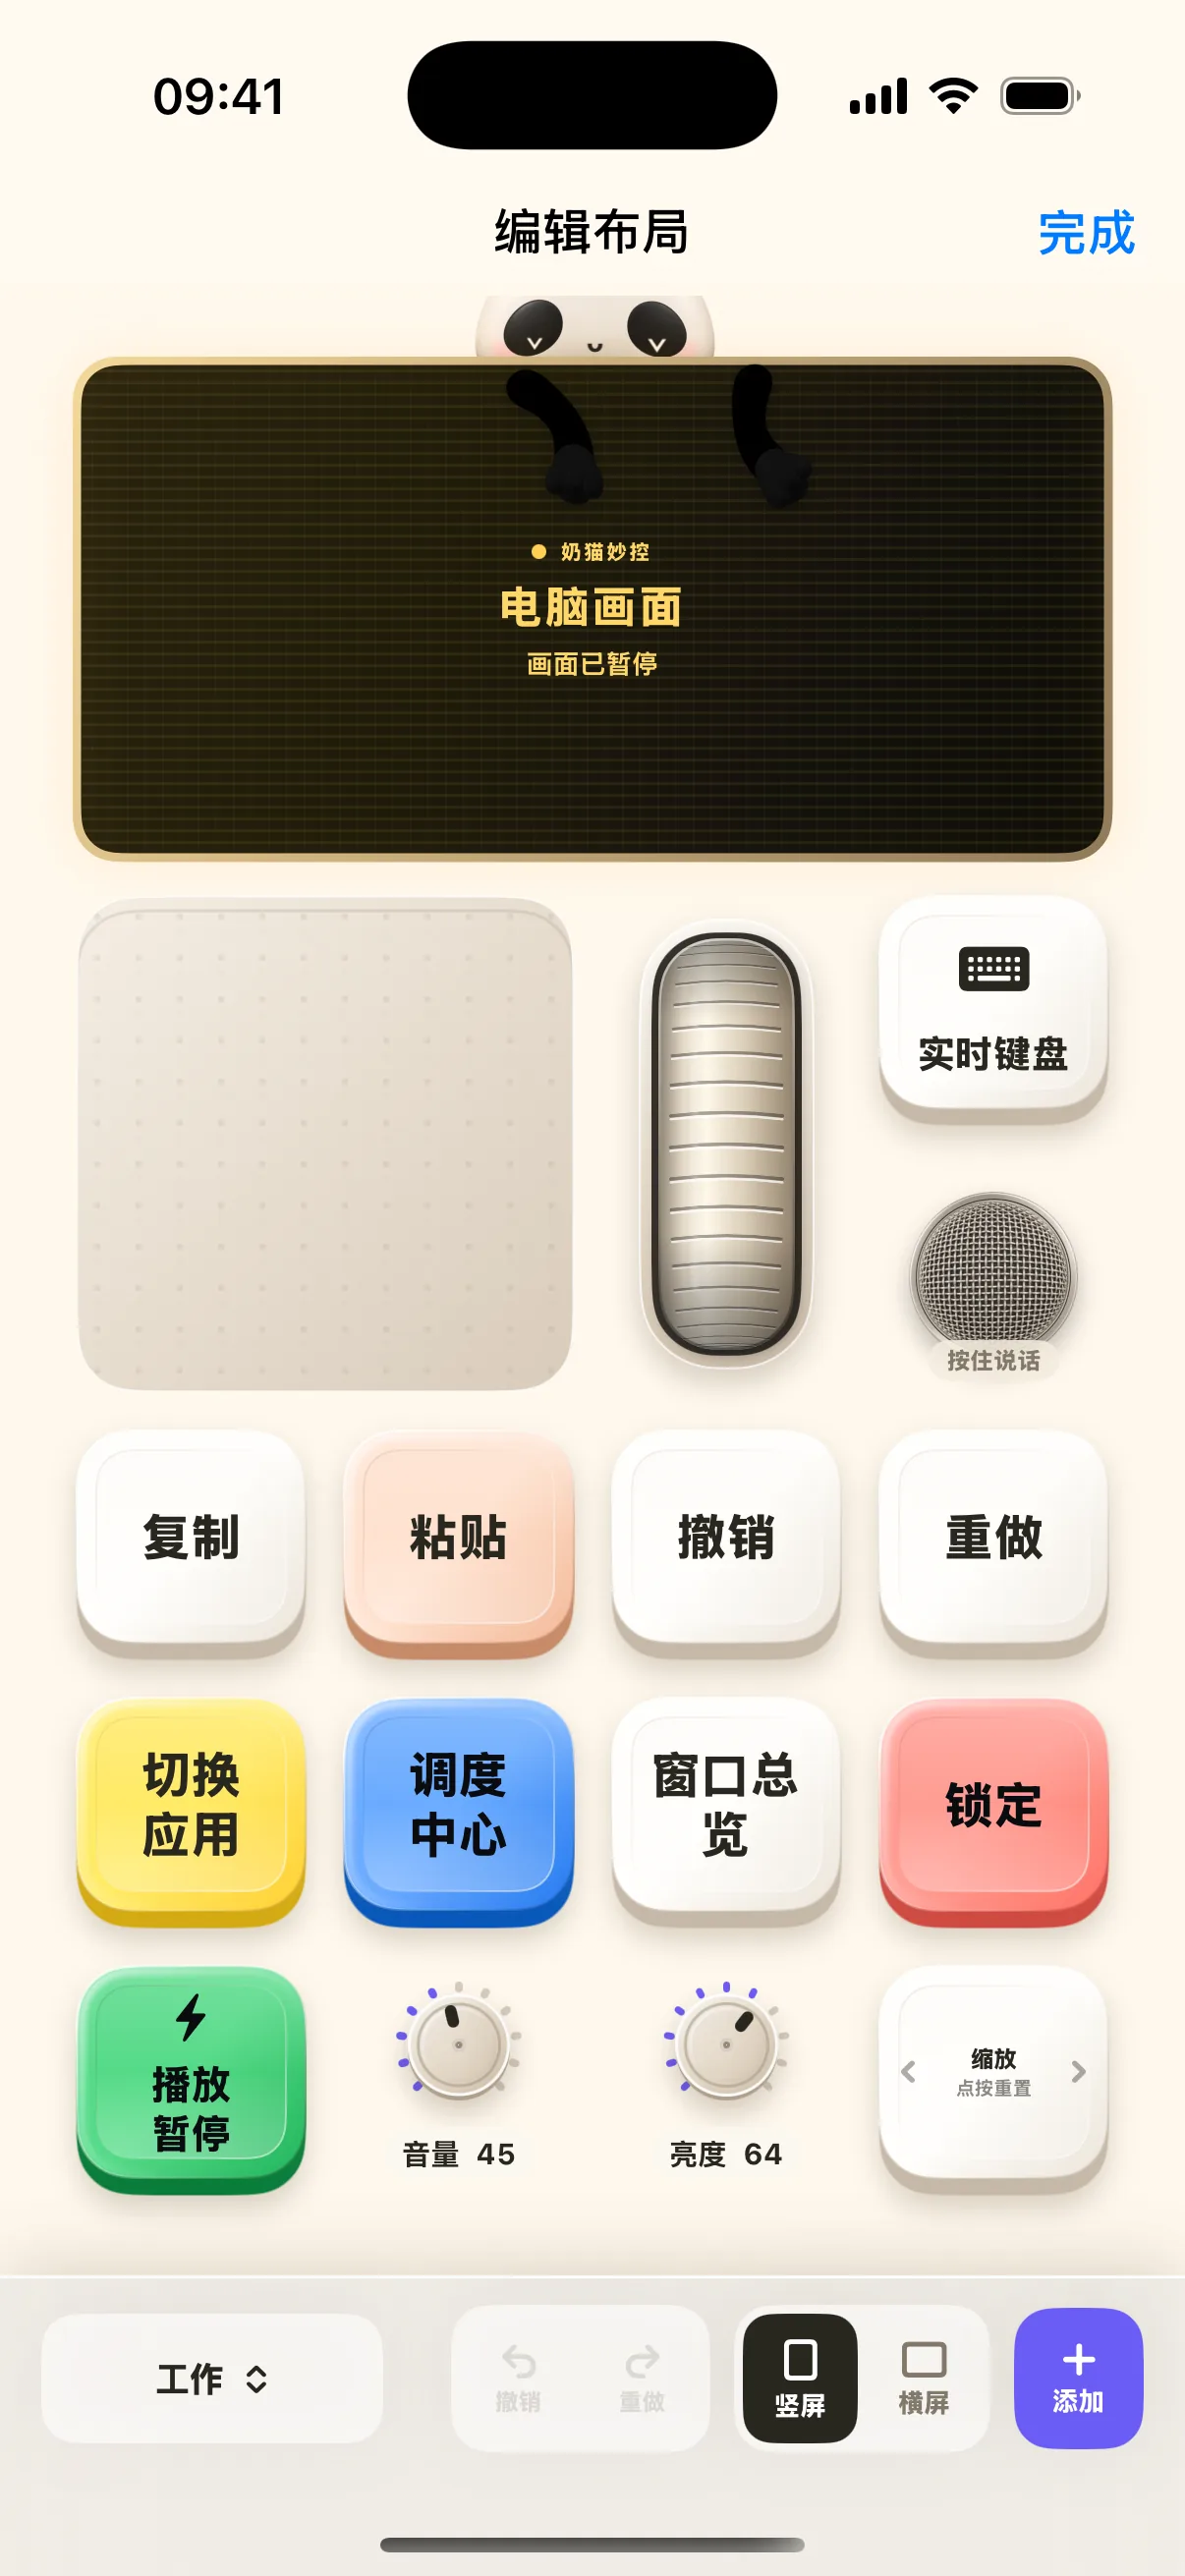
Tap "Layouts → Edit Current Desktop" at the bottom of the screen to open the desktop editor. Select any widget to modify its position, appearance, or assigned action.
- Long press and drag any button to reposition it across the grid;
- Tap "Add Widget", choose "Button", and assign your desired action to the new control;
- Tap an existing button to open its appearance and property configuration sheet.
3. Add Buttons and Adjust Grid Dimensions
NinoPad allows flexible resizing of every component's grid footprint. In the "Dimensions" section of appearance settings:
- Width Adjustment: Supports 1 to 8 grid columns in landscape mode, and 1 to 4 grid columns in portrait mode;
- Height Adjustment: Supports 1 to 8 grid rows.
Depending on usage frequency, configure items as compact single-cell icons or expansive multi-line display panels.
4. Bind Actions and Shortcuts
In the action configuration panel, assign specific execution logic to each button:
- Send Text: Inject boilerplate replies, customer service templates, or code snippets, with an option to append Return/Enter automatically;
- System Shortcuts: Record single or combination hotkeys like
⌘C,⌘V,^Tab, and more; - Launch Mac App: Search and bind any installed Mac application to bring it frontmost with a single tap;
- Multi-Step Macros: Chain multiple keypresses, delays, and text inputs into an automated sequence.
5. Customize Icons, Colors, and Wallpapers
Give your keypad a distinct personality with visual customization:
- Button Palette: Choose from retro cream, mint green, lilac, coral, and midnight themes;
- Haptic Feedback: Enable crisp tactile clicks on every touch for satisfying physical feedback;
- Dynamic Wallpapers: Set animated video backgrounds or custom camera roll wallpapers.
6. Test with Mac and Enjoy Your Setup
Exit edit mode and connect to your Mac over local Wi-Fi. Press your newly created buttons to verify that Mac shortcuts trigger seamlessly. Your custom deck is now ready to boost your daily workflow!